Plan it
Board cut schedule
Every panel you'll need to cut, sized to actual milled lumber dimensions. Print this page or download the PDF to take into your workshop.
| Panel | Dimensions | Qty | Notes |
|---|---|---|---|
| Front | 5.5″ × 9″ | 1 | Drill a 1.125" entrance hole 7" from the bottom, centered. Score the interior wood below the hole to create 'ladder' grips for fledglings. |
| Back | 5.5″ × 16″ | 1 | Provides a 3.5" mounting flange on both the top and bottom. |
| Side | 5.5″ × 9″ | 2 | Cut the top edge at a 10-degree angle (sloping from 9" back to 8" front) to shed water. |
| Roof | 5.5″ × 9″ | 1 | Attach with a hinge or screws for easy cleaning; if using a 1x8 scrap instead, it provides better side overhang. |
| Floor | 4″ × 4″ | 1 | Recessed 1/4" up from the bottom of the sides; clip 1/2" off all four corners for drainage. |
Source board layout
The main body panels (Front, Back, Sides) are all 5.5" wide. The floor must be ripped down to 4" to fit between the two side panels. Use the remaining 1x6 material for the roof, though a 1x8 scrap is a recommended upgrade for better weather protection.
Get materials
Shopping checklist
Check off items as you gather them — your progress is saved in your browser so you can come back to this page anytime.
Build it
Construction notes
- Wood: 3/4-inch (19 mm) untreated cedar or white pine. Avoid pressure-treated lumber, plywood, or OSB.
- Boards: A single 1" x 6" x 6' untreated cedar board provides enough material for all panels with room for errors.
- Hardware: 20x 1-5/8" galvanized deck screws, 2x 1-1/2" stainless steel exterior hinges, 1x brass eye hook and latch, 4x 2-1/2" exterior wood screws for mounting, 1/4 cup wood shavings (optional)
- Ventilation: Leave a 1/4-inch gap between the top of the side panels and the roof, or drill two 3/8-inch holes near the top of each side panel.
- Drainage: Clip the corners of the floor panel at a 45-degree angle to create 1/2-inch gaps for drainage.
- Predator guard: Use a 1.125-inch thick wood block (portal guard) over the entrance hole to prevent squirrels from chewing it wider. Install a 24-inch stovepipe baffle on the mounting pole to stop snakes, raccoons, and cats.
Install it
Place it & time it right
Install the box on a tree trunk or 4x4 post near the edge of a wooded area or within a mature garden. Space boxes at least 50 feet apart to avoid territorial disputes with other chickadees. Avoid high-traffic areas or spots directly above dense shrubs where cats might hide.
Seasonal timeline
When to install
Install by late January in the southern range and by late February in northern regions to allow birds to scout for winter roosting and spring nesting.
Nesting begins
Nesting typically begins in late March in the Southeast and West, while Mid-April is more common in the Northeast and Midwest. High-elevation populations may wait until May. Chickadees usually raise one brood per year, though a second is possible in southern latitudes.
Eggs & incubation
6-8 eggs · 12-13 days
Fledging & cleaning
16-18 days after hatching · Remove old nesting material immediately after the first brood fledges. Perform a deep clean with a 10% bleach solution in late fall after the birds stop using the box for winter roosting.
Regional considerations
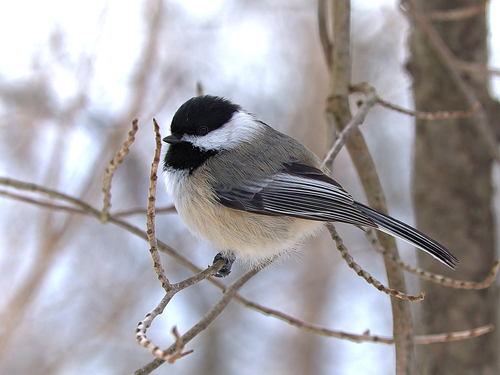
Black-capped Chickadees breed across the northern half of the United States, from Alaska through Canada to Newfoundland, and south into the northern Rocky Mountains and Appalachians. They are permanent residents and will use nest boxes throughout this entire range.
Nesting timing is heavily influenced by the emergence of caterpillars, their primary food source for nestlings. Earlier springs or lower elevations often result in earlier clutch dates, while a late frost can delay nesting by up to two weeks.
House Wrens and House Sparrows are the primary competitors; the 1.125-inch hole excludes sparrows, but wrens can still enter and may pierce chickadee eggs. Raccoons and snakes are the main physical predators, which the recommended stovepipe baffle and deep box design help mitigate.
Add a camera
Watch it happen
For Black-capped Chickadees, an interior camera mount is highly effective due to their tolerance of human-made structures. Because the interior of a chickadee box is quite compact (4x4 inches), a small USB-powered 'cube' camera or a dedicated nest box camera with a wide-angle lens is necessary. Mount the camera to the underside of the roof, angled slightly toward the back wall where the nest cup is typically constructed.
Ensure the camera has high-quality Infrared (IR) capabilities, as the interior of the box will be dark once the mother is sitting on the nest. Avoid cameras with visible white LEDs, as these can disrupt the birds' natural circadian rhythm. Routing the cable is best done through a small notch cut into the top of a side panel, hidden under the roof overhang to prevent water ingress.
Exterior cameras, such as a Blink Outdoor or a trail camera, can be mounted on a separate post 4 to 6 feet away, focused directly on the entrance hole. This allows you to capture the fascinating 'food delivery' behavior and the moment the fledglings take their first flight. For the most comprehensive view, use a small interior cam for the hatching process and an exterior cam for activity monitoring.
Off-grid power with a USB solar panel
Nest boxes are almost always far from a power outlet. A 5V USB solar panel with a built-in battery is the cleanest solution — it powers most interior USB cameras, Blink cameras (via their USB port), and many trail cameras indefinitely.
- Panel position: Mount on the same post as the box, 1–2 ft above, angled 30–45° from vertical and facing south.
- Cable routing: Run inside split loom or 1/2″ conduit so squirrels can't chew it. Enter through the same grommeted hole as the camera cable.
- Battery buffer: Pick a panel with a 5–10 Ah battery so the camera runs through cloudy days and overnight for nocturnal species.
- Weatherproofing: Wrap every cable connection in self-amalgamating rubber tape.
Troubleshoot
Common problems & solutions
House Wrens filling the box with sticks
If you see 'dummy nests' of sticks, the box is too close to thick brush; move the box to a more open area at least 15 feet from dense shrubbery.
House Sparrows trying to enlarge the hole
Install a metal 'hole protector' or a 1.5-inch thick block of hardwood with a 1.125-inch hole to prevent larger birds from chewing their way in.
Blowfly larvae in the nest
If the nest appears heavily infested, gently lift the nest and replace the bottom layer with clean wood shavings, though this should only be done by experienced handlers.
Box overheating in summer
Ensure ventilation gaps are clear and paint the exterior with a light-colored, non-toxic heat-reflective stain (never paint the interior).
Common questions
Frequently asked questions
The ideal entrance hole size is 1.125 inches (1 1/8"). This specific size is large enough for the chickadee but small enough to exclude the invasive House Sparrow, which is a major competitor for nesting sites.
Mount the box between 4 and 10 feet high. While chickadees aren't overly picky about height, mounting at eye level (around 5-6 feet) makes it easier for you to maintain and clean the box while still providing safety from ground predators.
It's best to have the box in place by late winter (February). Chickadees remain in their territories year-round and will often use the box as a warm roosting spot during cold winter nights before nesting begins in the spring.
Face the box east or southeast. This allows the morning sun to warm the box but protects the entrance from the prevailing west/northwest winds and prevents the interior from overheating in the direct afternoon sun.
House Wrens are the most common competitors. To discourage them, place the box away from the deep, brushy cover that wrens prefer. If wrens are persistent, you may need to move the box to a more open area of the yard.
Chickadees are one of the few species that may appreciate a small amount of material. Adding 1-2 inches of clean wood shavings (not cedar shavings) to the bottom can mimic the decaying wood they naturally excavate.
Take it with you
Download free PDF plans
Get a printable PDF with materials list, dimensions, assembly notes, and a QR code back to this page. We'll send occasional updates on new plans and habitat tips — unsubscribe anytime.
Prefer not to share your email? View materials online — everything is free and visible on this page.