Plan it
Board cut schedule
Every panel you'll need to cut, sized to actual milled lumber dimensions. Print this page or download the PDF to take into your workshop.
| Panel | Dimensions | Qty | Notes |
|---|---|---|---|
| Front | 5.5″ × 9.25″ | 1 | Drill 1.5" entrance hole 6.5" from bottom, centered. Score horizontal lines inside below hole for fledglings. |
| Back | 5.5″ × 16″ | 1 | Extends above and below the box for easy mounting to a post or pole. |
| Side (Door) | 5.5″ × 10.75″ | 1 | Angled top (10 degrees). Attach with one screw at top to serve as a swing-open door for cleaning. |
| Side (Fixed) | 5.5″ × 10.75″ | 1 | Angled top (10 degrees) to match roof slope. |
| Roof | 5.5″ × 11″ | 1 | Provides a 2-inch overhang at the front; consider using a 1x8 scrap for wider side coverage. |
| Floor | 4″ × 4″ | 1 | Recessed 1/4" up from bottom of sides. Clip corners for drainage. |
Source board layout
The majority of the box is built from standard 1x6 stock (5.5" actual width). By using a side-opening design, you allow for easy monitoring. The floor is cut slightly smaller (4") to fit snugly between the 3/4" thick side walls.
Get materials
Shopping checklist
Check off items as you gather them — your progress is saved in your browser so you can come back to this page anytime.
Build it
Construction notes
- Wood: 3/4-inch (19 mm) untreated cedar, pine, or redwood. Never pressure-treated.
- Boards: A single 1" x 6" x 6' untreated cedar board yields all primary panels, though a wider scrap for the roof is recommended.
- Hardware: 20x 1-5/8" galvanized deck screws, 2x 2" exterior wood screws for mounting, 1x 1-1/2" galvanized nail or pin for door latch, Optional: predator guard (copper or wood) for the entrance
- Ventilation: Leave a 1/2-inch gap between the top of the side walls and the roof to allow heat to escape during the summer.
- Drainage: Clip 1/2-inch off each corner of the floor panel and drill four 1/4-inch holes to ensure the nest remains dry after heavy rain.
- Predator guard: Install a 4-inch diameter stovepipe baffle on the mounting pole below the box. Additionally, use a 1.5-inch thick wood block over the entrance hole to prevent raccoons from reaching inside.
Install it
Place it & time it right
Place the box in an open area with short grass, such as a meadow, orchard, or large lawn. Ensure it is at least 100 yards (91 m) away from other bluebird boxes to prevent territorial disputes, and keep it away from dense undergrowth where house wrens or predators may hide.
Seasonal timeline
When to install
Late January to early February in the southern US; mid-February to early March in the northern US and Canada.
Nesting begins
In the Southeast, nesting can begin as early as March. In the Northeast and Midwest, activity typically peaks in late April or May. Southern populations may raise up to three broods, while northern birds usually raise one or two.
Eggs & incubation
3-7 eggs (usually 4-5) · 12-14 days
Fledging & cleaning
15-20 days after hatching · Remove the old nest immediately after the young fledge to encourage a second brood. Perform a deep clean with a stiff brush at the end of the season.
Regional considerations
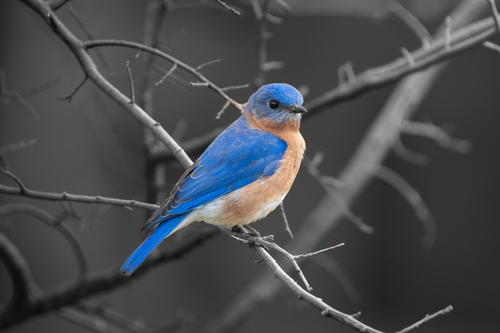
Eastern Bluebirds breed across the eastern half of North America, from southern Canada down to the Gulf Coast and into parts of Central America. They are most common in regions with open woodlands and agricultural edges.
Nesting begins earlier in lower latitudes and at lower elevations where spring temperatures stabilize sooner. In the north, start dates can be delayed by several weeks if a late-season cold snap occurs.
Raccoons, snakes, and domestic cats are the primary threats. A properly installed stovepipe baffle on a metal pole is the most effective way to prevent these predators from reaching the nest box.
Add a camera
Watch it happen
Eastern Bluebirds are excellent candidates for both internal and external AI-powered monitoring. For internal views, a small USB-powered wide-angle lens mounted to the underside of the roof (the "ceiling") provides a perfect top-down view of the nest cup, eggs, and the feeding process. Ensure the camera is tucked into the corner furthest from the entrance to avoid blocking the birds' flight path.
If using an external camera like a Blink or a trail cam, mount it on a separate post approximately 4 to 6 feet away from the entrance. This "porch view" captures the dramatic arrivals of the parents with insects and the eventual fledging of the chicks. Position the camera facing North or South to avoid the lens flare of the rising and setting sun.
For AI detection, bluebirds are bold and active during the day, so standard motion-triggering works well. However, ensure your camera has infrared (IR) capabilities for nighttime monitoring, as the female will spend significant time incubating in total darkness. Avoid any cameras with visible white LED lights, which can disturb the nesting cycle or attract predators.
Recommended Hardware: A high-definition interior bird box cam with a ribbon cable routed through the ventilation gap is ideal for the nest interior. For exterior shots, a weatherproof wireless camera with a 1080p resolution and AI-animal detection ensures you don't miss any of the action while keeping the setup clutter-free.
Off-grid power with a USB solar panel
Nest boxes are almost always far from a power outlet. A 5V USB solar panel with a built-in battery is the cleanest solution — it powers most interior USB cameras, Blink cameras (via their USB port), and many trail cameras indefinitely.
- Panel position: Mount on the same post as the box, 1–2 ft above, angled 30–45° from vertical and facing south.
- Cable routing: Run inside split loom or 1/2″ conduit so squirrels can't chew it. Enter through the same grommeted hole as the camera cable.
- Battery buffer: Pick a panel with a 5–10 Ah battery so the camera runs through cloudy days and overnight for nocturnal species.
- Weatherproofing: Wrap every cable connection in self-amalgamating rubber tape.
Troubleshoot
Common problems & solutions
House sparrow competition
Use an exact 1.5" entrance hole. If sparrows persist, use a 'sparrow spooker' after the first bluebird egg is laid or relocate the box further from human structures.
Wasps building inside
Apply a thin layer of unscented bar soap to the interior ceiling in early spring to prevent combs from adhering.
Blowfly larvae in nest
If you notice larvae during monitoring, gently lift the nest and remove them, or replace the bottom layer of nesting material if it is heavily infested.
Ants entering the box
Apply a small ring of automotive grease or 'Tanglefoot' to the mounting pole well below the box and baffle.
Common questions
Frequently asked questions
The ideal size is exactly 1.5 inches (38 mm). This allows Eastern Bluebirds to enter while preventing larger European Starlings from taking over the box.
Mount the box 4 to 6 feet above the ground. This height is convenient for monitoring and cleaning while being high enough to discourage some ground-based predators.
Boxes should be in place by late February. Bluebirds often begin scouting for nesting sites several weeks before they actually start building.
Face the box East or Southeast. This helps the box warm up in the morning sun but protects the entrance from the prevailing winds and the intense heat of the afternoon.
Avoid placing boxes near barns or areas where birdseed is scattered on the ground. Use a 1.5-inch hole and consider using a sparrow spooker once the bluebirds have committed to the nest.
In most regions, they raise two broods per year, but in the southern US, they can successfully raise three broods if conditions are favorable.
Clean the box immediately after every brood fledges. Removing the old nest material helps control parasites and encourages the pair to start a second nest.
Take it with you
Download free PDF plans
Get a printable PDF with materials list, dimensions, assembly notes, and a QR code back to this page. We'll send occasional updates on new plans and habitat tips — unsubscribe anytime.
Prefer not to share your email? View materials online — everything is free and visible on this page.