Plan it
Board cut schedule
Every panel you'll need to cut, sized to actual milled lumber dimensions. Print this page or download the PDF to take into your workshop.
| Panel | Dimensions | Qty | Notes |
|---|---|---|---|
| Front | 5.5″ × 9.25″ | 1 | Drill 1.25" entrance hole 6.5" from bottom, centered. Score horizontal 'ladder' lines inside below the hole. |
| Back | 5.5″ × 16″ | 1 | Standard mounting board; drill pilot holes at top and bottom for mounting screws. |
| Side | 5.5″ × 9″ | 2 | Cut top edge at a 10-degree angle to shed water. One side should be hinged for cleaning. |
| Roof | 7.25″ × 9″ | 1 | Cut from 1x8 stock to allow for a 1.75" side overhang and front drip edge. |
| Floor | 4″ × 4″ | 1 | Recess 1/4" up from the bottom of sides; clip 1/2" off corners for drainage. |
Source board layout
The body panels (front, back, sides) are ripped from a 1x6 board. The floor is also cut from 1x6 stock but ripped down to 4" to fit between the 3/4" sides. The roof must be wider than 5.5" to protect the side seams, requiring a 1x8 scrap.
Get materials
Shopping checklist
Check off items as you gather them — your progress is saved in your browser so you can come back to this page anytime.
Build it
Construction notes
- Wood: 3/4-inch (19 mm) untreated cedar or cypress for maximum weather resistance. Avoid pine if you live in extremely humid climates.
- Boards: 1x 1" x 6" x 6' untreated cedar board provides the body, while a small 1x8 scrap is used for the roof.
- Hardware: 20x 1-5/8" galvanized deck screws, 2x 1-1/2" exterior brass hinges, 1x stainless steel cabin hook, 4x 2-1/2" exterior mounting screws, 1x 1-1/4" galvanized slate nail for door stop
- Ventilation: Leave a 1/4-inch (6 mm) gap at the top of both side panels under the roof to allow heat to escape.
- Drainage: Clip all four corners of the floor board by 1/2-inch (13 mm) and drill four 1/4-inch (6 mm) holes in the center of the floor.
- Predator guard: A 1.5-inch thick wood block with a matching 1.25-inch hole (a 'portal') can be added to the front to prevent raccoons from reaching in. A stovepipe baffle on the mounting pole is highly recommended to stop climbing snakes and cats.
Install it
Place it & time it right
Position the box on the edge of a wooded area or in a yard with mature deciduous trees. Titmice are territorial, so ensure boxes are placed at least 100 feet (30 m) apart. Avoid placing the box in deep shade; a spot with dappled sunlight is ideal.
Seasonal timeline
When to install
Install in late fall or early winter (December-January) so birds can use it for roosting and scouting before the spring season.
Nesting begins
In the Southeast, nesting begins as early as late February or March. In the Northeast and Midwest, expect activity to pick up in mid-to-late April. Titmice typically raise one brood per year, but may attempt a second in the southern reaches of their range.
Eggs & incubation
5-8 eggs (usually 6) · 12-14 days
Fledging & cleaning
15-18 days after hatching · Remove old nesting material immediately after the young fledge. Conduct a deep clean with a 10% bleach solution in late autumn to prepare for winter roosting.
Regional considerations
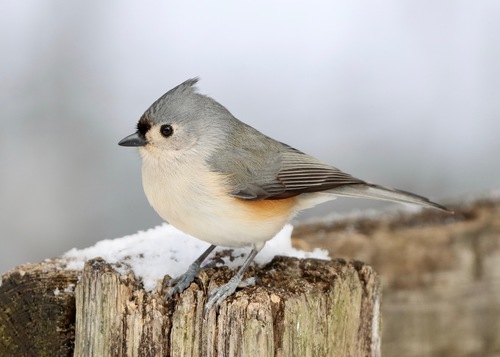
The Tufted Titmouse is found throughout the Eastern United States, from the Atlantic coast to the Great Plains. They are common in deciduous forests, orchards, and suburban areas with significant tree canopy.
Nesting is triggered by photoperiod and local temperature; southern populations may start three weeks earlier than those in the Great Lakes region. Higher elevation populations in the Appalachians will also start later than those in the coastal plains.
Rat snakes and raccoons are the primary threats. The recommended 1.25-inch hole specifically excludes starlings, while a pole-mounted baffle is the most effective defense against climbing predators.
Add a camera
Watch it happen
Because Tufted Titmice build remarkably thick nests—often composed of a base of moss, dried leaves, and even animal hair—interior camera placement is best achieved from the very top of the box. Mount a small, wide-angle USB or Wi-Fi camera directly to the underside of the roof, offset slightly from the entrance hole to capture both the brooding female and the incoming parents. Ensure the lens is focused for a distance of approximately 6 to 8 inches to account for the height of the nest cup as it grows during the season.
Exterior cameras are also highly effective for this species, as titmice are active and social. A battery-powered camera like a Blink Outdoor mounted on a nearby branch or a dedicated post 5 feet away provides excellent footage of their 'staging' behavior before entering the box. Since titmice are sensitive to changes in their immediate environment during the construction phase, it is best to have all camera hardware installed and tested before the nesting season begins in early spring.
For high-quality results, use a camera with infrared (IR) night vision capabilities. Titmice are cavity nesters that appreciate a dark interior, and white LEDs can be disruptive to their natural sleep and incubation cycles. Routing cables through a small 1/4-inch notch in the upper corner of a side panel will keep the box weather-tight while providing a secure path for power if you are not using a battery-powered unit.
Lastly, consider the 'hair-plucking' behavior of the titmouse. They are known to harvest fur from living animals for their nests. An exterior camera can often catch them arriving with impressive mouthfuls of fluff, providing unique behavioral data that an interior camera might miss once they dive into the deep nest cup.
Off-grid power with a USB solar panel
Nest boxes are almost always far from a power outlet. A 5V USB solar panel with a built-in battery is the cleanest solution — it powers most interior USB cameras, Blink cameras (via their USB port), and many trail cameras indefinitely.
- Panel position: Mount on the same post as the box, 1–2 ft above, angled 30–45° from vertical and facing south.
- Cable routing: Run inside split loom or 1/2″ conduit so squirrels can't chew it. Enter through the same grommeted hole as the camera cable.
- Battery buffer: Pick a panel with a 5–10 Ah battery so the camera runs through cloudy days and overnight for nocturnal species.
- Weatherproofing: Wrap every cable connection in self-amalgamating rubber tape.
Troubleshoot
Common problems & solutions
House Wren competition
Place the box at least 30 feet away from dense brush or thickets where wrens prefer to nest.
Blowfly infestation
Ensure floor drainage is clear; if infestation occurs, replace the bottom inch of nesting material with clean dried grass during the nestling stage.
House Sparrow aggression
The 1.25" hole is slightly small for many sparrows, but if they persist, move the box further into a wooded area away from open lawns.
Wet nesting material
Increase the roof overhang to 2 inches and ensure the roof is slanted at least 10 degrees to shed rain away from the hole.
Common questions
Frequently asked questions
The ideal size is 1.25 inches (32 mm). This diameter is large enough for the titmouse but small enough to exclude larger, more aggressive competitors like the European Starling.
Mount the box between 5 and 15 feet high on a metal pole or a tree. Higher placement (10+ feet) is generally safer from ground predators and more attractive to this species.
Put the box up by late autumn or mid-winter. Titmice often stay in their territory year-round and will use the box for shelter during cold winter nights before nesting starts in spring.
Facing the box East or Northeast is best. This avoids the prevailing western winds and prevents the interior from overheating during the hot afternoon sun.
Titmice prefer slightly more open wooded areas compared to wrens. Avoid placing boxes near dense, low-growing shrubs or brush piles, which are the primary habitat for wrens.
They typically raise only one brood per year, though a second attempt may occur if the first nest fails early in the season.
Clean the box in late summer after the young have fledged. Titmice are very tidy, but removing the moss and hair prevents parasite buildup for the following year.
Take it with you
Download free PDF plans
Get a printable PDF with materials list, dimensions, assembly notes, and a QR code back to this page. We'll send occasional updates on new plans and habitat tips — unsubscribe anytime.
Prefer not to share your email? View materials online — everything is free and visible on this page.