Plan it
Board cut schedule
Every panel you'll need to cut, sized to actual milled lumber dimensions. Print this page or download the PDF to take into your workshop.
| Panel | Dimensions | Qty | Notes |
|---|---|---|---|
| Front | 5.5″ × 10″ | 1 | Drill 1.25" entrance hole 7" from bottom, centered. Score horizontal 'ladder' grooves on the interior below the hole. |
| Back | 5.5″ × 16″ | 1 | Extends 3" above and 3" below the box for easy mounting to a tree or post. |
| Side | 5.5″ × 10″ | 2 | Cut top edge at a 10-degree angle to shed water; one side should be hinged for cleaning. |
| Roof | 7.25″ × 9″ | 1 | Use a 1x8 scrap to create side overhangs; mount with a 2-inch front overhang. |
| Floor | 4″ × 4″ | 1 | Recessed 1/4" up to keep it dry; trim corners 1/2" for drainage. |
Source board layout
The front, back, sides, and floor are all cut from the 1x6 board (5.5" actual width). The floor must be ripped down to 4" to fit inside the side panels. A separate 1x8 scrap is recommended for the roof to ensure it is wide enough to protect the side seams from rain.
Get materials
Shopping checklist
Check off items as you gather them — your progress is saved in your browser so you can come back to this page anytime.
Build it
Construction notes
- Wood: 3/4-inch (19 mm) untreated cedar, pine, or redwood. Never pressure-treated.
- Boards: One 1" x 6" x 6' untreated cedar board provides the main body, while a small 1" x 8" scrap is ideal for the roof.
- Hardware: 20x 1-5/8" galvanized deck screws, 2x 1-1/2" exterior hinges, 1x 2" galvanized common nail (used as a locking pin for the side door), 2x 3" lag bolts for mounting
- Ventilation: Drill two 1/4-inch (6 mm) holes near the top of each side panel to allow hot air to circulate out.
- Drainage: Drill four 1/4-inch (6 mm) holes in the floor panel and clip the corners by 1/2-inch (13 mm) to prevent standing water.
- Predator guard: Install a 1.5-inch thick wood block (portal protector) over the entrance hole to prevent squirrels from chewing into the box. If pole-mounting, use a 24-inch stovepipe baffle to stop raccoons and snakes.
Install it
Place it & time it right
Mount the box on a mature deciduous tree or a sturdy pole at the edge of a woodland. Ensure a clear flight path to the hole and keep the box away from bird feeders to reduce competition and stress from other species.
Seasonal timeline
When to install
Late January to early February across most regions to ensure the box is weathered and available for early scouts.
Nesting begins
In the Southeast, nesting can begin as early as mid-March. In the Northeast and Midwest, nesting typically starts in mid-to-late April. Western populations vary by elevation but generally begin in early April.
Eggs & incubation
5-9 eggs (usually 6-8) · 12-14 days
Fledging & cleaning
14-26 days after hatching · Remove old nesting material immediately after the first brood fledges in early summer, and do a deep clean with a 10% bleach solution in late fall.
Regional considerations
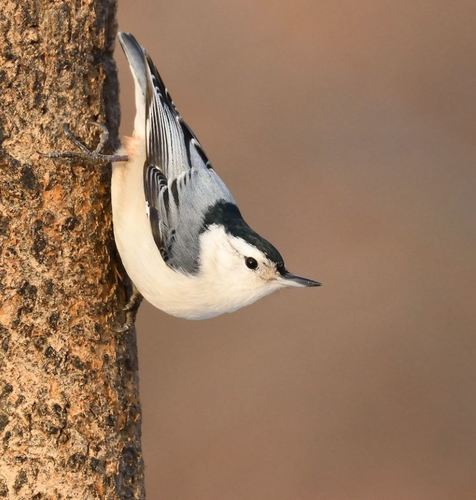
The White-breasted Nuthatch breeds across most of the United States and southern Canada, primarily in deciduous forests. They are especially fond of oak, beech, and hickory trees in the East and ponderosa pines in the West.
Nesting begins earlier in southern latitudes and at lower elevations. In the mountainous West, breeding is often delayed by several weeks until temperatures stabilize and insect activity increases.
Raccoons, squirrels, and House Wrens are the primary threats. The recommended 1.25" hole size is critical for excluding House Sparrows, while the mounting height helps deter ground-based predators.
Add a camera
Watch it happen
Because Nuthatches are small and their nests are typically cup-shaped at the bottom of the box, an interior camera should be mounted at the very top of the box. A small, high-definition USB camera with a wide-angle lens works best here, as it can capture the entire floor area where the female will spend most of her time incubating. Be sure to secure all cables against the interior walls using cable clips so the birds don't get tangled.
Nuthatches exhibit a fascinating behavior called 'bill-sweeping,' where they rub crushed insects or vegetation around the entrance hole to deter predators with chemical scents. To witness this, consider a secondary exterior camera. An outdoor-rated camera like a Blink or a wireless trail cam mounted 3 to 5 feet away on an adjacent tree provides the perfect perspective of the bird's acrobatic maneuvers as they land and enter the box.
Lighting is a critical factor for successful observation. While Nuthatches are diurnal, the interior of the box remains dark. Use a camera equipped with 940nm 'invisible' infrared LEDs. Unlike 850nm LEDs, which glow faintly red and might disturb the birds, 940nm LEDs are completely invisible to both humans and birds, ensuring the most natural behavior during nighttime monitoring.
For cable management, drill a small 1/4-inch hole at the top of the side panel, just below the roofline. Route your USB or power cable through this hole and seal the gap with a bit of exterior-grade putty or silicone to prevent drafts and moisture from entering the nesting chamber. This setup ensures a professional, weather-proof installation that won't interfere with the annual cleaning of the box.
Off-grid power with a USB solar panel
Nest boxes are almost always far from a power outlet. A 5V USB solar panel with a built-in battery is the cleanest solution — it powers most interior USB cameras, Blink cameras (via their USB port), and many trail cameras indefinitely.
- Panel position: Mount on the same post as the box, 1–2 ft above, angled 30–45° from vertical and facing south.
- Cable routing: Run inside split loom or 1/2″ conduit so squirrels can't chew it. Enter through the same grommeted hole as the camera cable.
- Battery buffer: Pick a panel with a 5–10 Ah battery so the camera runs through cloudy days and overnight for nocturnal species.
- Weatherproofing: Wrap every cable connection in self-amalgamating rubber tape.
Troubleshoot
Common problems & solutions
House Wren competition
Mount the box at least 30 feet away from dense shrubs or brush piles, which are the House Wren's preferred habitat.
Squirrels enlarging the hole
Attach a metal hole protector or a 1.5-inch thick 'predator block' of cedar over the entrance.
Box overheating
Ensure ventilation holes are clear and paint the exterior a light, natural color (if not using cedar).
Blowfly larvae in nest
During cleaning, ensure all old debris is removed and the box is completely dry before the next season.
Common questions
Frequently asked questions
A 1.25 inch (32 mm) hole is ideal. This specific size allows the nuthatch to enter easily while preventing larger, aggressive House Sparrows from taking over the box.
Mount the box between 12 and 20 feet (3.7-6.1 m) high on a mature tree. Nuthatches prefer higher elevations than many other backyard birds.
Put the box up by late winter, around early February. This gives the birds time to find it before the spring nesting season begins.
Face the box east or northeast. This protects the interior from the hot afternoon sun and keeps rain from being driven into the entrance hole by prevailing winds.
Place the box in more open woodland settings rather than near thickets, as wrens prefer dense cover. You can also try using a second box specifically for wrens nearby.
White-breasted Nuthatches usually only raise one brood per year, though they may attempt a second if the first nest fails early in the season.
Clean the box once in the fall after the nesting season is completely over. This prevents the buildup of parasites and makes it ready for use as a winter roost.
Take it with you
Download free PDF plans
Get a printable PDF with materials list, dimensions, assembly notes, and a QR code back to this page. We'll send occasional updates on new plans and habitat tips — unsubscribe anytime.
Prefer not to share your email? View materials online — everything is free and visible on this page.